Shop our best deals online.
Shop Now
How to Install Solid Hardwood Floor and Make Your Space Shine
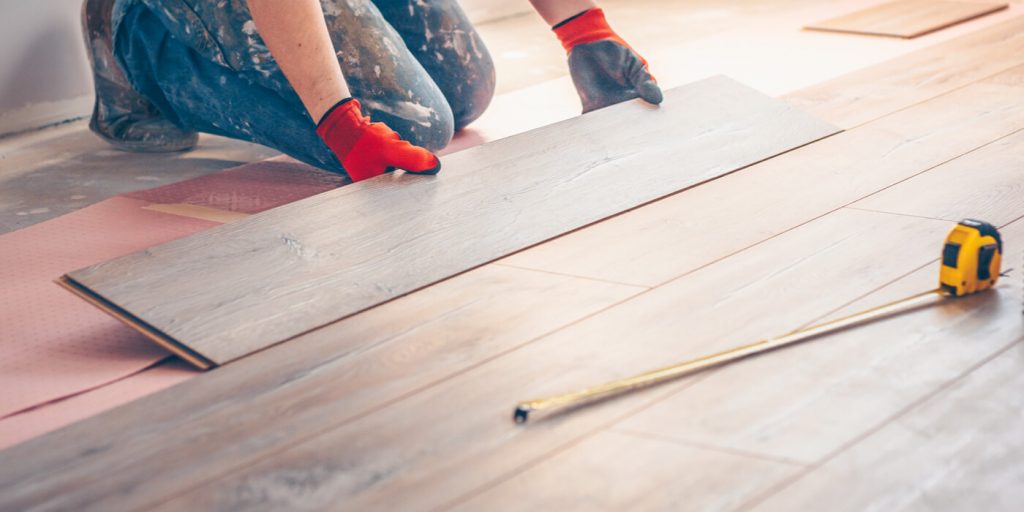
Table of Contents
- 1 What is Solid Hardwood Floor Installation?
- 2 1. Prepare Your Space and Gather Materials
- 3 2. Acclimate Your Hardwood
- 4 3. Plan Your Floor Layout
- 5 4. Preparing the Subfloor
- 6 5. Installing Your Hardwood Flooring
- 7 6. Cutting and Fitting Around Obstacles
- 8 7. Sanding and Staining
- 9 8. Adding the Final Touches
- 10 9. Maintenance and Care for Long-Lasting Hardwood Floors
- 11 10. When to Call a Professional
- 12 Conclusion
- 13 FAQs
Solid hardwood floors add timeless beauty and value to any home. Installing them can be an exciting yet challenging project. Whether you’re upgrading your living room, bedroom, or any other space, knowing how to install solid hardwood floor will help you achieve the best possible results. Proper installation not only enhances your home’s aesthetics but also ensures durability for years to come.
This guide will walk you through everything you need to know, from floor layout to final finishing touches, ensuring that you can enjoy your new hardwood floors with confidence. Let’s dive into the steps for a successful installation.
What is Solid Hardwood Floor Installation?
Solid hardwood floor installation refers to the process of laying down solid hardwood planks directly onto a subfloor, such as plywood or concrete. This type of flooring is made from a single piece of natural wood, like oak, maple, or walnut, and is secured using nails, adhesive, or a floating method. The installation typically requires an expansion gap along the edges to allow for natural wood movement due to temperature and humidity changes. Solid hardwood floors can be nailed down, glued down, or installed as a floating floor, depending on the preference and the subfloor type. Once installed, the floor may need to be sanded, stained, and finished to achieve a smooth, polished look.
1. Prepare Your Space and Gather Materials
Before you begin installing your new solid hardwood flooring, preparation is key. Taking the time to gather the necessary tools and materials ensures the process runs smoothly and the outcome is flawless. Here’s what you’ll need:
Essential Tools for Installation:
- Tape measure: To measure your room dimensions and plan the floor layout.
- Flooring nails or a flooring nailer: Used for securing the planks to the subfloor.
- Chalk line: To mark straight reference lines for a uniform layout.
- Pro bar: To remove damaged or old flooring and help with adjusting planks.
- Claw hammer: For driving nails or adjustments.
- Nail setter: To set nails below the surface for a smooth finish.
- Tapping block: Used to tap planks into place without damaging the edges.
- Pull bar: Helps lock planks into place, especially near walls.
- Wood putty or wood filler: To fill in any gaps or nail holes once the floor is laid.
Materials Needed:
- Solid hardwood planks (choose from oak, walnut, hickory, maple, cherry, or other species)
- Underlayment: If your subfloor is concrete, a moisture barrier is also necessary.
- Expansion gap spacers: To allow the wood to expand and contract naturally with temperature and humidity changes.
- Sanding equipment (if not using pre-finished hardwood).
- Finish coat (Polyurethane or a similar durable finish).
You can also explore this guide on How to Pick Solid or Engineered Hardwood Flooring for Living Spaces.
2. Acclimate Your Hardwood
Before you start laying the floor, it’s essential to acclimate your solid hardwood planks. Acclimation refers to letting the planks adjust to the temperature and humidity levels in your home. This prevents warping, cupping, or expansion once the wood is installed.
How to Acclimate: Leave your hardwood planks in the room where they will be installed for 48–72 hours, ensuring they are well-ventilated. The temperature should be around 60°F–80°F, with humidity levels between 35% and 55%.
3. Plan Your Floor Layout
Proper floor layout is essential to ensuring a smooth and aesthetically pleasing installation. A good floor layout prevents slivers of wood along edges and ensures the grains flow consistently across the room.
Start with a Straight Line
Begin by measuring and marking the center of the room with a chalk line. This serves as the foundation for your installation. Starting from the center gives you symmetry on both sides, minimizing any awkward gaps along the walls.
Dry Run
Before fastening any planks, perform a dry run. Lay out several rows of solid hardwood to see how they fit. Adjust the layout as needed to avoid cutting too many planks. This is especially important for rooms with obstacles like doorways or corners.
4. Preparing the Subfloor
For a successful flooring installation, the subfloor must be clean, dry, and level. Follow these steps:
- Check for moisture: Use a moisture meter to check your subfloor for excess moisture, especially if it’s concrete. If the moisture content (MC) is too high, wait until it stabilizes.
- Level the subfloor: Ensure the subfloor is smooth and level. Any dips or high spots can cause uneven boards. If the subfloor is uneven, use a leveling compound to fix it.
5. Installing Your Hardwood Flooring
Now that your subfloor is ready, it’s time to begin the installation process.
Step 1: Lay the First Row
Start by placing your first row of solid hardwood planks along the longest wall in the room. Leave a small expansion gap (around 1/8-inch) between the planks and the wall to allow the wood to expand naturally.
Tip: Use a floor gap fixer tool to ensure the boards fit tightly but not too tightly.
Step 2: Use a Flooring Nailer or Adhesive
If you are installing a floating floor, click-lock systems are easy to set up, and no adhesive is needed. However, for traditional solid hardwood flooring, secure each plank using a flooring nailer or flooring nails. Place nails at an angle through the tongue of the board.
If using glue, apply flooring adhesive to the tongue and groove of each plank, then press them into place.
Step 3: Continue Laying the Floor
Continue laying the planks row by row. Use a tapping block and pull bar to fit each plank tightly together, especially near the wall edges. Be sure to stagger the seams between rows for a natural look and to enhance stability.
6. Cutting and Fitting Around Obstacles
You will likely encounter obstacles such as doorways, vents, or walls. To fit the planks around these features, use a tape measure to take precise measurements and mark where cuts are needed.
Cutting the Planks
Use a saw to cut the planks. A jigsaw or oscillating saw works well for intricate cuts around corners or door frames. For straight cuts, a circular saw or handsaw should suffice. Always measure twice before cutting to avoid errors.
7. Sanding and Staining
Once the floor is installed, you can finish it with sanding and staining to enhance the wood’s appearance.
- Sanding: Lightly sand the entire floor using sandpaper to smooth out any rough spots or imperfections. If your wood is unfinished, you may need to sand more thoroughly to prepare the surface for stain and finish.
- Staining: Apply a wood stain of your choice using a brush or cloth, following the grain pattern. Allow the stain to dry completely.
- Finish: Apply a durable finish coat, like polyurethane, to seal and protect the wood. Depending on your preference, you can choose between matte, satin, or glossy finishes.
8. Adding the Final Touches
Once the staining and finishing are complete, it’s time to install the baseboards, trim, and transition strips. This will cover the expansion gap and give the floor a polished, professional look.
- Install Baseboards and Trim: Secure baseboards using finishing nails. Ensure they are aligned and snug to the floor.
- Place Transition Strips: For rooms that meet other flooring types, install transition strips to create a smooth transition between surfaces.
9. Maintenance and Care for Long-Lasting Hardwood Floors
To keep your solid hardwood flooring looking great, proper care is essential. Follow these tips:
- Regular Cleaning: Sweep or vacuum regularly to remove dirt and debris. For a deeper clean, use a microfiber mop with a cleaner formulated for hardwood floors.
- Humidity Control: Maintain consistent humidity levels in your home to prevent moisture damage, such as warping or cupping.
- Furniture Protection: Use furniture pads to avoid scratches and dents from heavy furniture.
10. When to Call a Professional
While many homeowners successfully install their own solid hardwood flooring, some repairs or issues may require professional help. If you experience subfloor problems, large-scale moisture damage, or require intricate custom cuts, it may be worth hiring an experienced installer or repair specialist.
Conclusion
Installing solid hardwood flooring can be a rewarding project, adding beauty and value to your home. With the right tools, proper planning, and an understanding of the installation process, you can achieve stunning, long-lasting results.
If you’re not sure where to start or need assistance with repairs, Flooring Outlet & More is here to help. Our experts can guide you through the best hardwood options, professional installation, and maintenance tips to ensure your floors continue to shine for years.
FAQs
1. How is solid hardwood flooring installed?
Solid hardwood flooring is typically installed using the nail-down method, where the planks are nailed into the subfloor. It can also be installed using glue-down or floating floor systems for easier installation. Proper underlayment is essential for moisture control.
2. How to install a solid hardwood floor on plywood?
To install solid hardwood floors on plywood, first ensure the plywood is level, clean, and dry. Use a moisture barrier if needed, then nail the planks down, ensuring there’s an expansion gap around the room. Follow the manufacturer’s installation instructions for best results.
3. How to install hardwood flooring on plywood without nails?
You can install hardwood flooring on plywood using glue-down methods or a floating floor system. For the glue-down method, apply flooring adhesive to the subfloor and place the planks on top. Use a weight roller to ensure a tight bond.
4. How to install hardwood floor on the subfloor?
When installing hardwood floors on the subfloor, ensure the subfloor is clean, dry, and level. Apply a moisture barrier or underlayment as needed. Secure the planks with nails or adhesive, ensuring a 1/4-inch expansion gap around the edges for proper expansion.
5. Do you put anything under solid wood flooring?
Yes, you typically need underlayment when installing solid hardwood flooring. This layer protects against moisture from the subfloor, reduces noise, and adds cushioning. For concrete subfloors, a moisture barrier is essential to prevent moisture damage to the hardwood.


