Shop our best deals online.
Shop Now
How to Remove Laminate Flooring Without Breaking the Planks
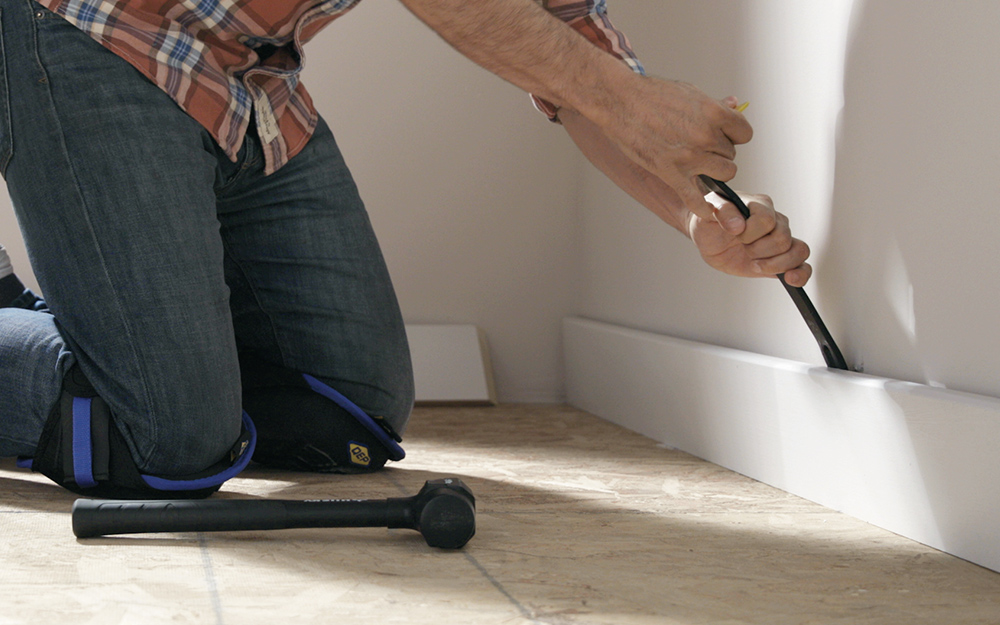
Table of Contents
Laminate flooring offers a durable and aesthetically pleasing surface for many homes. However, circumstances often arise where removing laminate flooring becomes necessary. Perhaps you are updating your home’s aesthetic, repairing water damage, or preparing for a different type of floor. Whatever the reason, knowing how to remove laminate flooring correctly is crucial, especially if you plan to salvage the planks for reinstallation or minimize waste. This guide provides an expert, step-by-step approach to help you achieve a clean and efficient removal process while keeping the integrity of your planks intact.
Removing laminate flooring does not have to be a daunting task. With the right tools and techniques, you can ensure a smooth transition to your next flooring project. We will walk you through preparation, the actual removal, and essential post-removal steps, focusing on preserving the planks.
Essential Tools and Preparation for Removing Laminate Flooring
Proper preparation and having the right tools on hand simplify the entire process. Gathering everything before you start ensures efficiency and helps prevent accidental damage to the planks or your subfloor.
Gathering Your Equipment
Having specific tools makes this job much more manageable. Here’s what you will need:
- Utility Knife: For cutting caulk or underlayment.
- Pry Bar or Flat Bar: Essential for lifting planks and removing trim.
- Rubber Mallet: To gently tap planks apart or loosen stubborn sections.
- Chisel: For detailed work or stubborn adhesive.
- Safety Glasses and Gloves: Always prioritize personal safety.
- Dust Mask: To protect against airborne particles.
- Shop Vacuum: For cleaning debris during and after removal.
- Plastic Sheeting or Tarps: To protect exposed areas and contain dust.
- Buckets or Trash Bags: For debris disposal.
- Floor Removal Tool: A specialized tool designed to lift planks with minimal effort, often beneficial for larger areas.
Preparing the Workspace
Before you even touch a plank, adequately prepare the room. This includes clearing all furniture and ensuring accessibility to the entire floor area. Removing baseboards and trim pieces is the initial step in exposing the edge of your laminate.
Start by scoring the caulk line between the baseboard and the wall with a utility knife. This scoring helps prevent paint or drywall damage when the trim is removed. Use a flat pry bar to gently pry the baseboards away from the wall. Work slowly and carefully to avoid damaging the trim, as you may wish to reuse it. You can mark the back of each piece of trim as you remove it to ensure it goes back into its original spot easily. Proper subfloor preparation is vital for any new flooring installation, so taking care during removal sets the stage for future success.
Step-by-Step Guide to Removing Laminate Flooring
Now that your workspace is prepared and your tools are ready, it’s time to begin the actual removal. The key to preserving planks lies in understanding how laminate planks interlock.
Locating the Starting Point
Most laminate floors are installed starting from one wall and expanding across the room. To remove them without damage, you generally want to reverse this process. Identify the last wall where the laminate was installed. This often means locating the short planks or the planks that were cut to fit precisely against the wall.
If you are unsure, start by looking for a starter row or an expansion gap nearest a wall. Sometimes, the easiest way to begin is from a door frame or an area where a transition strip is present. The goal is to find the first plank that can be lifted without directly interfering with many others.
Disengaging the Planks
Laminate planks typically feature a tongue-and-groove or click-lock system. This mechanism holds them together securely without adhesive. To disengage them, you must reverse the locking action.
- First Plank: Carefully pry up the first plank from an edge, usually the one against the wall. Use a pry bar, being mindful of the pressure. Angle it slightly to avoid snapping the tongue or groove.
- Subsequent Planks: Once the initial plank is free, the subsequent planks can often be disengaged more easily. Lift the plank at an angle, around 20-30 degrees, and gently pull it away from the plank it is locked into. You should feel the locking mechanism release. Avoid forcing it, as this is where breakage commonly occurs.
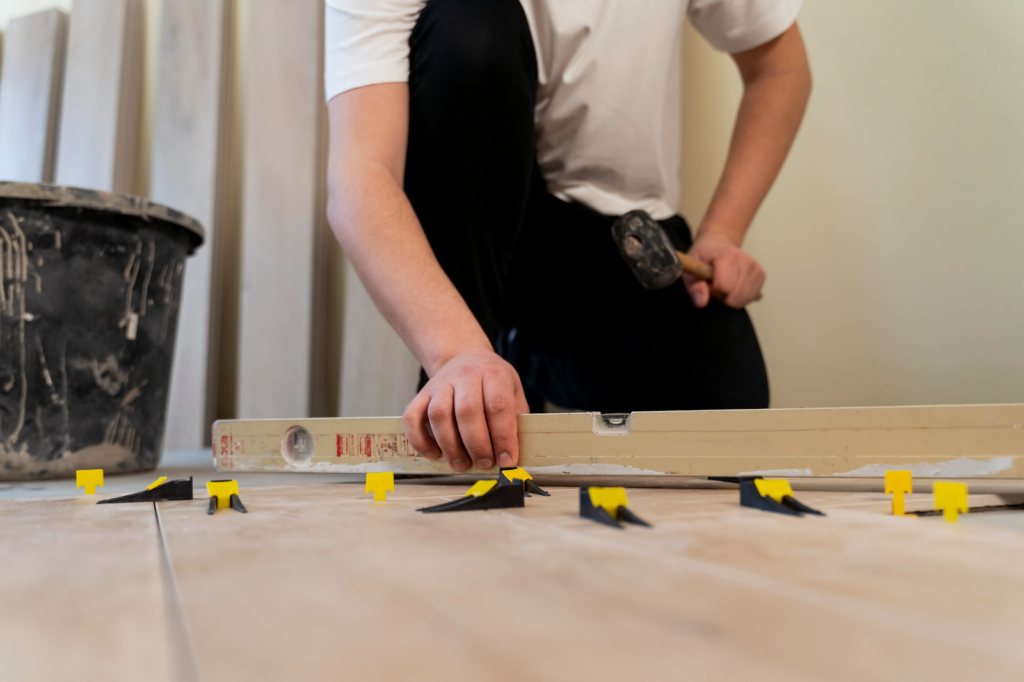
- Working in Rows: Continue this method, working one row at a time. This systematic approach helps maintain the planks’ condition. If a plank is particularly stubborn, a rubber mallet and a wood block might help to gently tap the plank’s edge to encourage separation without damaging it.
For more insights into handling flooring with care, consider learning about how to properly clean and maintain your laminate flooring which gives you a deeper understanding of its structure.
Dealing with Tricky Areas
Some areas, such as around door jambs or oddly shaped spaces, might have planks cut uniquely. These might require a bit more finesse. If a plank is tightly fit, sometimes a chisel can help gently separate it from an adjacent piece or lift it from the subfloor.
In some installations, especially older ones, a small amount of adhesive might have been used at the edges or in high-traffic areas. If you encounter adhesive, a heat gun on a low setting can sometimes soften it, allowing for easier removal. Always exercise caution with heat and ensure good ventilation.
Post-Removal: Storage and Subfloor Preparation
Once all the laminate is removed, don’t forget the vital steps that follow to properly manage your removed planks and prepare for the next project.
Inspecting and Storing Salvaged Planks
After removing laminate planks, inspect each one for damage. Lay flat any planks you intend to reuse or dispose of. Bundle them together with tape or straps. This keeps them organized and prevents warping. Store them in a dry, temperature-consistent environment to avoid moisture absorption or expansion, similar to how acclimate solid hardwood flooring is handled.
Cleaning and Preparing the Subfloor
The subfloor is the foundation for your next flooring. After removing the laminate, a thorough cleaning is paramount. Vacuum up all dust, debris, and any remnants of underlayment. Scrape off any adhesive residues or inconsistencies. The goal is a clean, level, and dry surface.
Depending on your next flooring installation, further subfloor preparation may be needed. This can include patching holes, leveling uneven spots, or adding a new moisture barrier. A properly prepared subfloor contributes significantly to the longevity and performance of your new flooring. Consider whether you need a specialized moisture barrier for laminate flooring if re-installing laminate, or if you’re transitioning to products like luxury vinyl plank flooring where subfloor conditions are slightly different.
Common Pitfalls and How to Avoid Them
Even with careful planning, issues can arise. Knowing common challenges helps you navigate them better.
- Broken Locking Mechanisms: Forcing planks apart is the leading cause of damage. Remember to angle the planks and apply gentle, even pressure. If the planks stick, try re-angling or slightly tapping with a rubber mallet.
- Damaged Subfloor: Aggressive prying can gouge or damage your subfloor. Always use a protective piece of wood or cardboard under your pry bar to distribute pressure. Repairing the subfloor properly is a focus for all flooring types, including engineered hardwood.
- Insufficient Cleaning: Leaving debris on the subfloor can cause future problems, such as unevenness or issues with new adhesive application. Invest time in thorough cleaning and inspection.
- Ignoring Safety: Splinters, sharp edges, and heavy planks pose risks. Always wear gloves, safety glasses, and sturdy shoes.
Understanding your flooring types can help with more than just maintenance; it assists in removal too. For instance, what is the difference between laminate and vinyl that can impact removal techniques
Conclusion
Removing laminate flooring without breaking the planks is an achievable goal for any homeowner or DIY enthusiast. By following this comprehensive guide, using the correct tools, and approaching the task methodically, you can effectively dismantle your laminate floor while preserving its components. This careful approach not only saves time and potential costs but also prepares your space optimally for its next transformation. Whether you are installing a solid hardwood floor or choosing the best carpet, a well-prepared subfloor is your best ally.
For more expert advice, quality flooring materials, and professional installation services in San Jose, trust Flooring Outlet & More. Our team is ready to assist with all your flooring needs, from selection to removal and installation.
FAQs
1. What tools do I need to remove laminate flooring?
You’ll primarily need a pry bar, hammer, utility knife, safety glasses, and gloves. A knee kicker or pull bar can also be helpful for stubborn planks.
2. Is it hard to remove laminate flooring?
Removing laminate flooring is generally considered a straightforward DIY task, especially for floating installations. It can be time-consuming, but doesn’t usually require specialized skills or heavy machinery.
3.How do I start removing laminate flooring?
Begin by removing any baseboards or trim around the perimeter of the room. Then, locate a starting point, usually along a wall, and carefully pry up the first plank, working your way across the floor.
4. Can I reuse laminate flooring after removing it?
While technically possible, reusing laminate flooring is often difficult due to potential damage to the locking mechanisms during removal. It’s generally not recommended for a high-quality reinstallation.
5. Do I need to remove the underlayment when taking up laminate flooring?
Yes, it’s typically recommended to remove the old underlayment along with the laminate flooring. This ensures a clean subfloor for your new flooring and prevents potential issues with unevenness or moisture.


