Shop our best deals online.
Shop Now
How to Match Existing Hardwood Floors With New Wood and Hide the Seam
Table of Contents
- 1 How to Match Existing Hardwood Floors With New Wood
- 2 Why New and Old Wood Look Different
- 3 Ways to Close the Gap Between Old and New
- 4 Matching Prefinished Engineered Hardwood
- 5 Hiding the Seam Where Old Meets New
- 6 A New Floor That Belongs Beside the Old One
- 7 Sources
- 8 Frequently Asked Questions
- 8.1 Q: How to match existing hardwood floors with new wood when the colors differ?
- 8.2 Q: Will new hardwood eventually match the old floor?
- 8.3 Q: Can engineered hardwood be matched to a solid hardwood floor?
- 8.4 Q: Is it better to refinish the whole floor or match the new section?
- 8.5 Q: What is the best place to put the seam between old and new flooring?
Learning how to match existing hardwood floors with new wood starts with one fact: the old floor has aged and the new boards have not, so an exact match on day one is unlikely. The reliable approach is to compare grade, cut, width and species before buying, choose boards that are close in character, and place the seam where the eye is least likely to land. When the old floor is site finished, refinishing old and new together can give the most even result.
This guide covers why old and new wood look different, the main ways to bring them closer together, how matching works with prefinished engineered hardwood, and how to hide the seam where the two floors meet.
How to Match Existing Hardwood Floors With New Wood
A hardwood floor is rarely one color. It is a collection of boards with different grain, different shading and a surface that has changed under years of daylight. New boards arrive without any of that history. Set beside a floor that is ten or twenty years old, even the right species can look like it came from a different house.
The first step is to treat the existing floor as the specification. Measure the width of the boards, note the species if it is known, look at the grain pattern, and take a close look at the finish. Then bring the best sample you can find to the room instead of judging from a photo. The engineered hardwood flooring selection includes a range of species, tones and plank widths, and holding real samples against the existing floor in the room is the quickest way to see which ones are in range.
Before choosing a board, work through three questions.
- How much of the new area will be visible from the old floor? A small patch in a corner asks less of a match than a large section in the middle of a room.
- Does the room get strong daylight? Light pushes the old floor toward its aged color, which widens the gap with new boards.
- Is the existing floor in good enough shape to hold a match at all?
A scratched, worn floor beside a crisp new section looks uneven even with the right color, and that can change the plan from matching to refinishing or replacing. Look at samples in morning light and in evening lamp light, because the tone of wood shifts with the light source.
Two facts keep expectations realistic. A match is a range, not a point, and the goal is a transition that looks planned. Where a perfect match is out of reach, a seam that reads as a deliberate change can look better than a patch that almost matches and fails to.
Why New and Old Wood Look Different
Wood changes after it is installed, and the change is the reason new boards stand out. Hardwood Floors Magazine quotes installers explaining that all wood is photosensitive, which means it darkens or fades under light. Most species darken slightly in sunlight, while some fade under strong exposure. How much changes depends on the species and on where the floor sits in the house. A board near a sunny window ages faster than one under a hallway rug.
Once a floor has been exposed to ultraviolet light for years, the installers describe it as very hard to match both the wood and the finish. A new section laid beside an old one therefore looks bright and flat at first, even when the stain is identical.
Grade, Cut and Width Matter Too
Color is only one part of the difference. The article advises checking the grade, the cut, the width and the average length of the existing floor before buying new boards. Grades vary between manufacturers, so one maker’s select grade can look different from another’s. For floors cut as rift or quarter sawn, the number of boards showing wood rays is part of the comparison. Board length matters as well. A floor made of long boards beside a section of short ones looks mismatched even when the color agrees.
The Species Label May Be Wrong
One installer in the article describes a floor that was reported to be red birch, ordered both red and yellow birch, and found that the clients agreed the existing floor looked like yellow birch. Old information about what is in the house can be wrong, which is a good reason to compare actual boards instead of relying on a species name.
Ways to Close the Gap Between Old and New
There is no single method that works for every house. The right choice depends on whether the existing floor is site finished or prefinished, whether it is solid or engineered (the guide on choosing between engineered and solid hardwood explains how they differ), how large the new area is, and how far apart the tones are. The table compares the main approaches.
| Approach | How It Works | Where It Falls Short |
| Refinish old and new together | Sanding and finishing both floors in one pass gives a shared surface and color | Suits site finished solid hardwood, and the old floor is disturbed as well. Engineered floors only where the product allows it |
| Adjust the new wood | Stain color, a tinted finish or water popping darkens new wood to approach the old | Tinting drifts over time when tones start far apart |
| Source similar boards | Match grain, length and age from salvage, a closet or reclaimed stock | Supply is limited and sample testing is needed |
| Let the new wood age | Install without tinting and let light exposure change the new wood over time | The new area looks new at first, and there is no guarantee it will ever match |
Refinishing Old and New Together
The installers quoted by Hardwood Floors Magazine describe refinishing the existing floor at the same time as a new installation on site finished jobs. One sanding pass, one stain and one finish across both areas removes the biggest differences in surface and sheen. The trade off is that the existing floor is part of the project, which means furniture moved out, dust and a longer schedule.
This approach applies to site finished solid hardwood. Prefinished engineered hardwood is different, because whether it can be sanded or refinished depends on its construction, wear layer thickness, condition and the manufacturer’s guidance. If the existing floor is engineered, the guide on refinishing engineered hardwood explains what the wear layer allows. Confirm that a floor can be sanded before planning to refinish it together with new boards.
Adjusting Color on the New Wood
Changing the stain, tinting the finish or water popping the wood, which means dampening the surface so it takes a darker and richer color, can move new boards toward the old. The same source adds a warning. When the tones are far apart, tinting can backfire, because the new wood keeps aging under the finish and drifts away from the old floor again.
Sourcing Similar Boards and Letting Time Work
Salvaged boards from a closet or another part of the house, or reclaimed stock from a demolition, can supply wood that has already aged. Some installers keep older stock for small repairs, in common widths, for exactly this reason. Where a perfect match is not available, one installer in the article simply explains patina to the client, who accepts that the new wood looks new at first. New hardwood may change color with exposure to light, but there is no guarantee that it will eventually match an existing floor. The result depends on the wood species, finish, lighting conditions, and how the original flooring has aged.
Matching Prefinished Engineered Hardwood
Most of the advice above comes from site finished floors, where stain and finish can be adjusted on the spot. Engineered hardwood usually arrives prefinished, which changes the options. The color and sheen are set at the factory, so the match has to be made by choosing the right plank, not by adjusting it on site.
That puts more weight on samples. Compare the face of the plank, the sheen, the width and the bevel at the edges against the existing floor in the room. A prefinished plank with a beveled edge beside a flat, site finished floor shows a line at every joint even when the color agrees. Plank thickness matters as well, because a new floor that sits higher or lower than the old one leaves a step at the seam that needs a transition piece.
There is a second benefit. A prefinished engineered floor installed in a new room, a hallway or an addition can be treated as a separate floor with its own transition, which avoids the match problem entirely. Whether an engineered floor can be refinished later depends on its construction, wear layer thickness and the manufacturer’s guidance, which matters before planning to sand old and new together.
Before installation, follow the flooring manufacturer’s storage, moisture testing, and acclimation requirements. These vary by product and construction. The post on why engineered hardwood needs to acclimate explains the reasoning behind them. Habits that keep both floors steady after the seam is in place are covered below.
Hiding the Seam Where Old Meets New
When a match cannot be perfect, the location and shape of the seam do most of the work. The aim is to put the change where the eye expects one.
Use Doorways and Natural Breaks
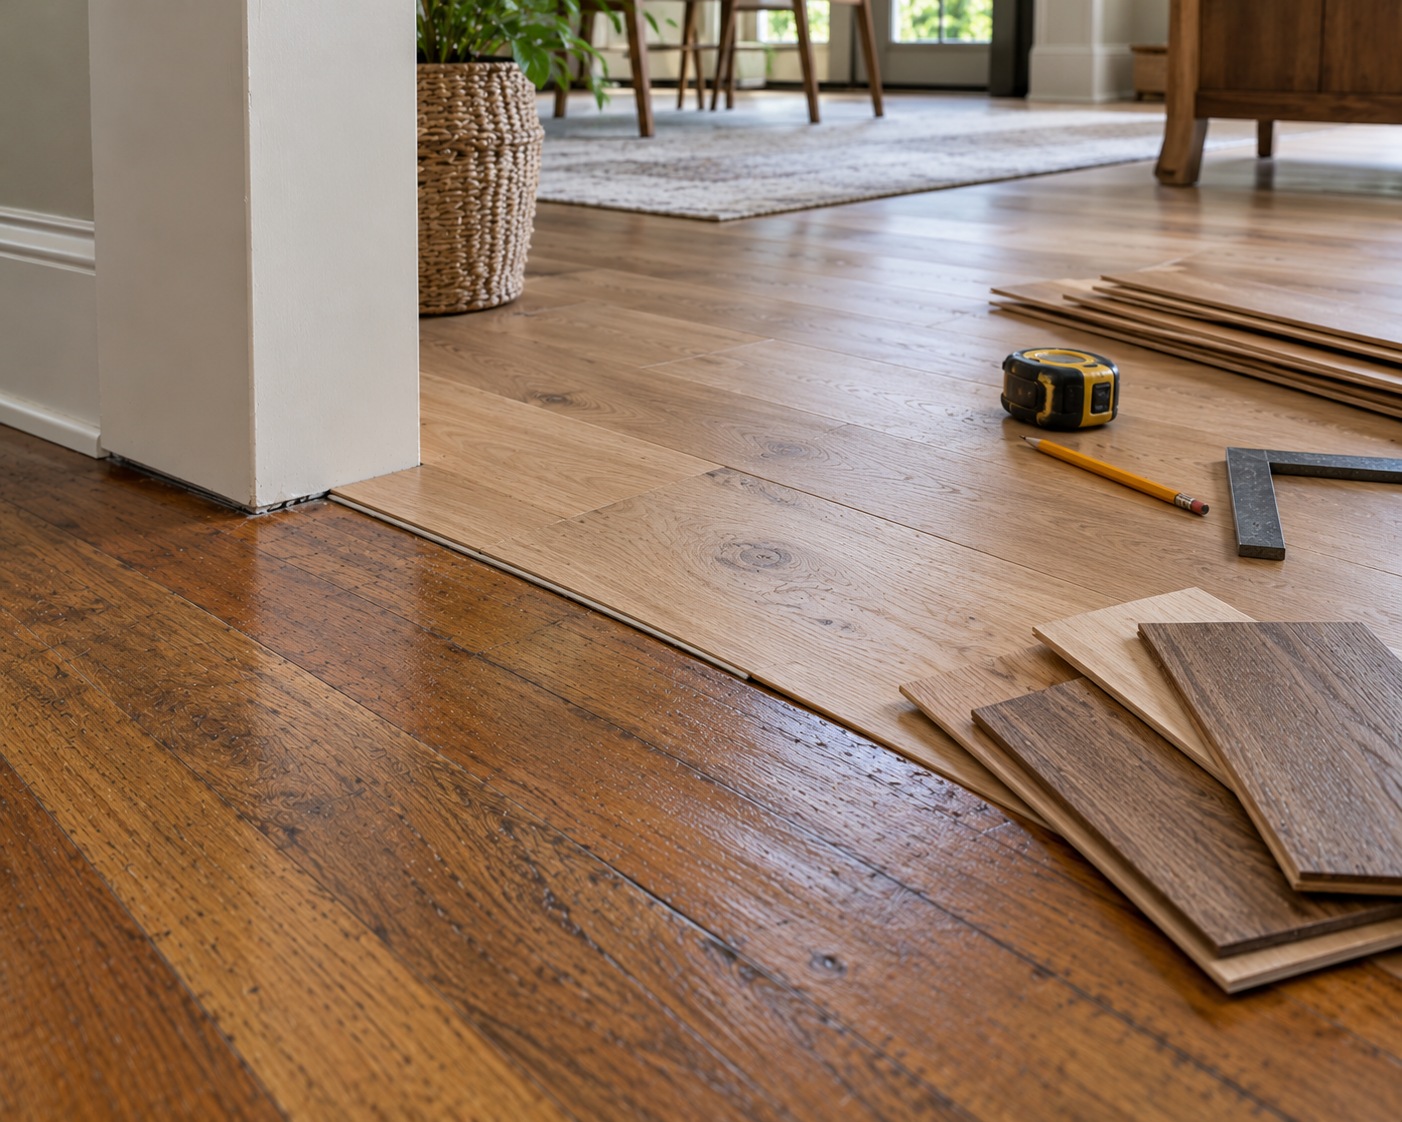
A doorway, a change in room use or the edge of a hallway gives the eye a reason to accept a different tone. A seam in the middle of an open room looks like a mistake, while the same seam at a door threshold looks like a boundary. Strips, direction changes and color strategies for this exact situation are covered in the post on transitioning between hardwood floors in an open floor plan.
Weave New Boards Into the Old Floor
For repairs and small additions, installers can weave new boards into the existing floor by alternating them with old boards at the edge of the new area. The article notes that using a larger weave, instead of a standard lace and weave, gives more material for blending. The seam becomes a gradual change in place of a straight line.
Let Trim Cover the Edge
At a wall, the finish trim covers the gap between the floor and the wall framing. Well fitted baseboards also hide small differences in height or sheen at the room edge. At a transition, a strip does the same job across a doorway, and the transition has to be a deliberate choice of profile and color, not a leftover.
When a Different Floor Is the Better Answer
If the old floor is too far gone to match, or the new area is a separate space such as an addition, a different material can be the cleaner solution. A vinyl flooring choice in a laundry room, mudroom or kitchen avoids any attempt to match wood, and a clean transition at the doorway keeps the two floors from competing. Switching material is also a sound option when the existing floor is in poor condition and the rest of the house is due for replacement.
Check for Seasonal Movement
A seam that looks tight in humid conditions may develop a gap when indoor air becomes drier. Wood expands and contracts as moisture levels change, so maintaining the flooring manufacturer’s recommended indoor conditions helps reduce seasonal movement. The ideal humidity range for hardwood floors matters most where old and new boards meet.
A New Floor That Belongs Beside the Old One
Knowing how to match existing hardwood floors with new wood comes down to treating the match as a range and planning the transition. Read the existing floor, bring real samples into the room, refinish both together when the floor allows it, and place the change at a doorway, a hall or a natural break. Where no combination looks right, a separate floor with a clean transition is a sound answer, and it looks better than an almost match.
Visit Flooring Outlet & More to explore the full range of engineered hardwood flooring and the installation materials that finish a seam cleanly. Contact us to talk through matching your floor.
Sources
- Hardwood Floors Magazine is a wood flooring trade publication, and its Tech Talk article collects installer advice on matching new flooring to existing floors on site finished jobs.
Frequently Asked Questions
Q: How to match existing hardwood floors with new wood when the colors differ?
A: Compare the grade, cut, width and species of the existing floor, choose boards close to it, and refinish old and new together when the floor is site finished solid hardwood. If the tones stay far apart, a planned transition at a doorway usually looks better than a forced match.
Q: Will new hardwood eventually match the old floor?
A: New hardwood may change color with exposure to light, but there is no guarantee that it will eventually match an existing floor. The result depends on the wood species, finish, lighting conditions, and how the original flooring has aged.
Q: Can engineered hardwood be matched to a solid hardwood floor?
A: Yes, but the match has to be made at the sample stage because engineered hardwood usually arrives prefinished. Compare color, sheen, width and edge bevel against the existing floor in the room, and plan a transition if the heights differ.
Q: Is it better to refinish the whole floor or match the new section?
A: Refinishing the whole floor gives the most even result on site finished floors because old and new share one surface and finish. Engineered floors can be refinished only where the construction and manufacturer guidance allow it. Refinishing also disturbs the existing floor, so the right choice depends on the condition of the old boards and the size of the project.
Q: What is the best place to put the seam between old and new flooring?
A: A doorway or natural break is the best place, because the eye accepts a change at a boundary. A seam in the middle of an open room is the hardest to hide.
About The Author