Shop our best deals online.
Shop Now
Installing a Hardwood Floor Over Concrete Without Moisture Ruining Your Investment

Table of Contents
- 1 Why Concrete Makes Hardwood Installation More Demanding
- 2 Step 1: Test the Concrete for Moisture
- 3 Step 2: Clean and Level the Concrete
- 4 Step 3: Install the Vapor Barrier for Hardwood Floors
- 5 Step 4: Hardwood Floor Acclimation
- 6 Step 5: Choose the Installation Method
- 7 Step 6: Layout, Installation, and Finishing
- 8 Ongoing Care After Installation
- 9 Preparation Is What Protects Your Investment
- 10 Frequently Asked Questions
- 10.1 Q: Can you install solid hardwood flooring directly over concrete?
- 10.2 Q: How long does hardwood floor acclimation take over a concrete subfloor?
- 10.3 Q: What is the best vapor barrier for hardwood floors over concrete?
- 10.4 Q: How flat does a concrete subfloor need to be for hardwood floor installation?
- 10.5 Q: Does engineered hardwood over concrete need an expansion gap?
Installing a hardwood floor over concrete is one of the most technically demanding flooring projects a homeowner can take on. Concrete subfloors are common in slab-foundation homes, basements, and ground-level rooms, but they present a specific set of challenges that plywood subfloors do not. Moisture vapor rises continuously through concrete and if it reaches the wood above, the consequences range from cupping and warping to joint failure and mold growth. This guide covers every step of the process from testing and preparation through vapor barrier selection, hardwood floor acclimation, and installation.
Why Concrete Makes Hardwood Installation More Demanding
The Core Problem: Moisture Vapor
Concrete looks solid and inert but it is a porous material that draws moisture from the ground beneath it continuously. Even a slab that feels completely dry to the touch emits significant moisture vapor. That vapor accumulates beneath the hardwood above. Wood absorbs the moisture, swells, and moves against neighboring planks. Over time the result is cupping, buckling, and in severe cases floors that lift entirely off the slab.
Hardwood Is Not Waterproof
All hardwood flooring, whether solid or engineered, is not waterproof. Solid hardwood is particularly sensitive because the wood runs through the full thickness of each plank. Engineered hardwood handles moisture variation better because of its cross-ply core, but its real wood veneer still responds to moisture and the adhesive layers within the core are not immune to sustained dampness.
This is why every preparation step for a concrete subfloor installation matters far more than it does over a plywood subfloor.
Which Hardwood Type Works Better Over Concrete
| Feature | Solid Hardwood | Engineered Hardwood |
| Moisture sensitivity | Very high | Moderate |
| Concrete compatibility | Above-grade only, with strict limits | Good with proper preparation |
| Installation method over concrete | Glue-down only | Floating or glue-down |
| Acclimation required | Yes, 5 to 14 days | Yes, 48 to 72 hours minimum |
| Refinishing potential | Multiple times | 1 to 2 times depending on veneer |
For above-grade slabs in dry climates with moisture within acceptable limits, solid hardwood glued to concrete is achievable. For below-grade or higher-moisture environments, engineered hardwood is the more appropriate and safer choice. Always verify which concrete conditions your specific product is rated for before committing to a purchase.
Step 1: Test the Concrete for Moisture
Why This Step Cannot Be Skipped
Moisture testing is the single most important step in any hardwood floor installation over concrete and the most commonly skipped. Assuming a slab is dry based on appearance alone is the most frequent cause of failed installations.
Three Testing Methods
Plastic Sheet Test
Tape a 2-foot by 2-foot piece of polyethylene film flat against the slab using waterproof tape on all four edges. Leave it for 48 to 72 hours. Condensation on the underside or darkening of the concrete beneath indicates active vapor transmission. This is a useful quick screening tool before committing to formal testing.
Calcium Chloride Test
This measures the moisture vapor emission rate from the concrete surface. Pre-weighed dishes of calcium chloride crystals are sealed to the slab for 60 to 72 hours then re-weighed. Most hardwood manufacturers require readings of 3 lbs per 1,000 square feet per 24 hours or below for solid hardwood and up to 5 lbs for some engineered products.
Relative Humidity Probe Test
The most accurate industry-standard method. Probes inserted into drilled holes measure the relative humidity within the slab itself. A reading of 75% or below is generally acceptable for most engineered hardwood products. Solid hardwood manufacturers typically require lower readings. Always check your specific product’s guidelines.
When Readings Are Too High
Do not proceed until the moisture source is addressed. Options include applying an epoxy or urethane moisture mitigation sealer directly to the slab, improving exterior drainage, or installing a sump pump in below-grade areas. Allow treatments to cure fully and retest before moving forward.
For broader guidance on protecting floors from moisture, see How to Prevent Water Damage on Your Floors.
Step 2: Clean and Level the Concrete
Cleaning the Slab
Sweep and vacuum the entire surface thoroughly. Remove all old adhesive residue, paint, sealers, and oil stains. Any residue that creates a layer between the concrete and your vapor barrier or adhesive compromises adhesion and can trap moisture beneath the floor.
Leveling the Surface
Acceptable Flatness Standard
Hardwood floor installation requires the concrete to be flat within 3/16 of an inch over a 10-foot span. Use a long straightedge or laser level to sweep methodically across the room and mark any problem areas.
Filling Low Spots
Fill depressions with a self-leveling compound. Mix according to manufacturer instructions and pour into the low area. Most compounds are walkable within a few hours and ready for flooring installation within 24 hours.
Grinding High Spots
High spots must be ground down with a concrete grinder or angle grinder. Vacuum all concrete dust thoroughly before proceeding. Never attempt to build up surrounding areas to match a high spot as this approach rarely produces a flat result.
Step 3: Install the Vapor Barrier for Hardwood Floors
Why It Is Non-Negotiable
The vapor barrier for hardwood floors over concrete is the primary defense against moisture vapor rising through the slab. Even when test readings are within acceptable limits, a quality vapor barrier provides ongoing protection that keeps moisture levels manageable beneath the wood over years of use.
Choosing the Right Vapor Barrier Type
Polyethylene film at 6-mil or heavier is the most common choice for floating engineered hardwood over concrete. Seams must be overlapped by 6 to 8 inches and sealed with moisture-resistant tape. No gaps can be left in coverage. A 10-mil film provides stronger protection in higher-moisture environments.
Epoxy or urethane moisture mitigation coating rolled directly onto the concrete is the strongest option for glue-down installations or slabs with elevated moisture readings. These products cure to form a seamless waterproof membrane that dramatically reduces vapor transmission with no seam gaps.
Combination underlayment products integrate a moisture barrier film with a padding layer in a single sheet. These simplify installation and are suitable for floating engineered hardwood in rooms with moderate moisture levels. Browse the installation materials and vapor barrier products available at Flooring Outlet & More.
Installing the Vapor Barrier Correctly
Roll the product out perpendicular to the direction your planks will run. Run it 2 to 3 inches up each wall to protect against moisture that migrates from wall bases. Overlap all film seams by 6 to 8 inches and tape every seam completely. Smooth out all wrinkles and bubbles before laying any flooring on top.
Step 4: Hardwood Floor Acclimation
Why Acclimation Cannot Be Skipped
Hardwood floor acclimation allows planks to reach equilibrium moisture content with the room’s environment before installation begins. If planks are installed before this balance is reached, they will continue to move after the floor is down, causing gaps, buckling, or joint stress at the locking connections.
This step is especially critical over concrete because basement and ground-level rooms often carry different humidity levels than the storage location where the wood was held before delivery.
How Long Acclimation Takes
Engineered hardwood requires 48 to 72 hours of acclimation in the installation room under typical conditions. In rooms with higher humidity or significant climate differences from the storage location, allow 5 to 7 days. Solid hardwood requires a minimum of 5 to 7 days and up to 14 days in climates with notable humidity variation.
How to Acclimate Correctly
Open all boxes and lay planks flat in the installation room with the HVAC system running as it will when the room is occupied. Place airflow spacers between layers of stacked planks so air can circulate around all surfaces. Use a pin-style moisture meter to take daily readings from multiple planks. When the moisture content of the planks is within 2 percentage points of the subfloor reading and has stopped changing significantly between readings, installation can begin.
Never acclimate in a garage, storage room, or any space other than the actual installation room unless that space is the intended installation location.
For a full breakdown of acclimation see Why Does Engineered Hardwood Need to Acclimate.
Step 5: Choose the Installation Method
Floating Installation
Floating installation uses a click-lock system where planks connect to each other and rest on the vapor barrier and underlayment without being bonded to the slab. This is the most DIY-friendly method and the preferred approach for engineered hardwood over concrete in rooms with moderate moisture levels.
Expansion gaps of at least 1/4 inch must be maintained around the entire perimeter and around all fixed obstacles. Never nail or staple through a floating floor into concrete.
Glue-Down Installation
Glue-down installation bonds planks directly to the concrete using a flooring adhesive spread with a notched trowel. This produces the most stable result, eliminates floor flex, and significantly reduces sound transmission. It is the preferred method for solid hardwood over concrete and for high-traffic engineered hardwood applications.
The concrete must be completely clean and free of any contaminants before adhesive is applied. An epoxy moisture mitigation coating is often applied to the slab before the adhesive in higher-moisture situations. The floor must not be walked on during the adhesive cure period, typically 24 to 48 hours.
Step 6: Layout, Installation, and Finishing
Planning the Layout
Measure the room width and divide by plank width. If the remaining piece at the far wall would be less than half a plank wide, shift your starting position so both walls end with balanced cut pieces. Snap a chalk line parallel to the starting wall to keep the first row straight. Run planks parallel to the longest wall or toward the primary natural light source.
Installing the Planks
Place spacers along the starting wall before laying the first plank. For floating floors, lock planks together using a tapping block and rubber mallet for long edges and a pull bar near walls. Stagger end joints between rows by at least 6 inches. For glue-down floors, spread adhesive in sections you can cover before it skins over and press each plank firmly into full contact.
Trim and Transitions
Once all planks are installed, remove all perimeter spacers. Install baseboard or quarter-round molding to cover the expansion gap, nailing it to the wall only and never through the floor. For doorway transitions to adjacent flooring use T-molding for same-height floors or a reducer for floors at different heights.
Ongoing Care After Installation
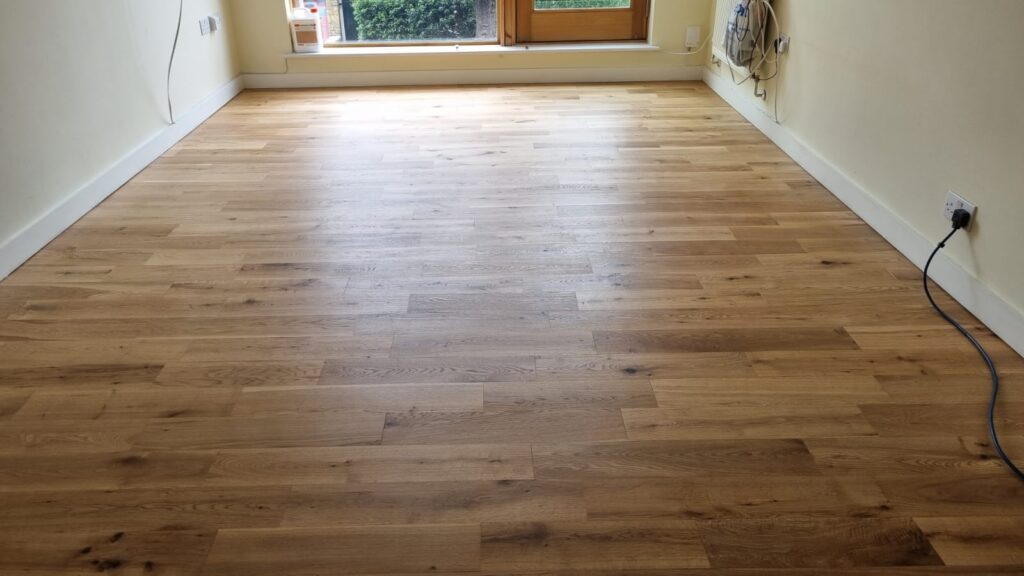
Allow the floor to settle for 24 hours before moving furniture back. For glue-down installations, wait the full adhesive cure period before placing heavy items. Maintain indoor humidity between 35% and 55% year-round. Clean with a damp mop using a cleaner formulated for hardwood. Never use a wet mop or steam mop on any hardwood surface over concrete.
For ongoing care guidance, see How to Care for Your Solid Hardwood Floors.
Preparation Is What Protects Your Investment
Installing a hardwood floor over concrete rewards careful preparation more than any other installation type. The moisture testing, slab leveling, vapor barrier selection, and hardwood floor acclimation steps are not optional formalities. They are what separate a floor that performs correctly for decades from one that fails within a few seasons. Take the time to do each step correctly and the investment in your hardwood floor delivers exactly what it promises.
Visit Flooring Outlet & More to explore our full selection of engineered hardwood and solid hardwood flooring along with all the installation materials needed for a concrete subfloor project including vapor barriers, underlayments, and flooring adhesives.
Frequently Asked Questions
Q: Can you install solid hardwood flooring directly over concrete?
A: Solid hardwood can be glued to above-grade concrete when slab moisture readings are within limits and a moisture mitigation coating is applied first. It is not recommended below-grade. Engineered hardwood is generally the safer choice for concrete subfloors due to its greater moisture stability.
Q: How long does hardwood floor acclimation take over a concrete subfloor?
A: Engineered hardwood typically needs 48 to 72 hours, extended to 5 to 7 days in higher-humidity rooms. Solid hardwood requires 5 to 7 days minimum and up to 14 days. Use a moisture meter daily and wait until readings stabilize before starting installation.
Q: What is the best vapor barrier for hardwood floors over concrete?
A: For floating engineered hardwood, a 6 to 10-mil polyethylene film with all seams sealed is standard. For glue-down installations, a roll-on epoxy or urethane coating applied to the slab provides the strongest and most reliable moisture protection with no seam gaps.
Q: How flat does a concrete subfloor need to be for hardwood floor installation?
A: The concrete must be flat within 3/16 of an inch over a 10-foot span. Fill low spots with self-leveling compound and grind down high spots. Skipping this step causes stress at locking joints in floating floors and adhesion voids in glue-down installations.
Q: Does engineered hardwood over concrete need an expansion gap?
A: Yes. A perimeter expansion gap of at least 1/4 inch is required around the entire room and around all fixed obstacles. Baseboard or quarter-round trim nailed to the wall only covers the gap while allowing the floor to move freely with seasonal changes.
About The Author